HTML packages
iDetailAid supports the upload of HTML5 packages in the content management system. These packages are used to allow rich animations or interactions to be provided as part of Slide.
All HTML5 content will be displayed within an <iFrame/> so that it is held in isolation from the other content thus preventing any conflicts with existing JavaScript and CSS that make up the content of individual slides.
The content should reflow to fill its width and height, so it can be easily sized in the iDetailAid slide editor for greater precision with content layout.
Example HTML 5 package
If you want to jump right, view the Code Samples
Example
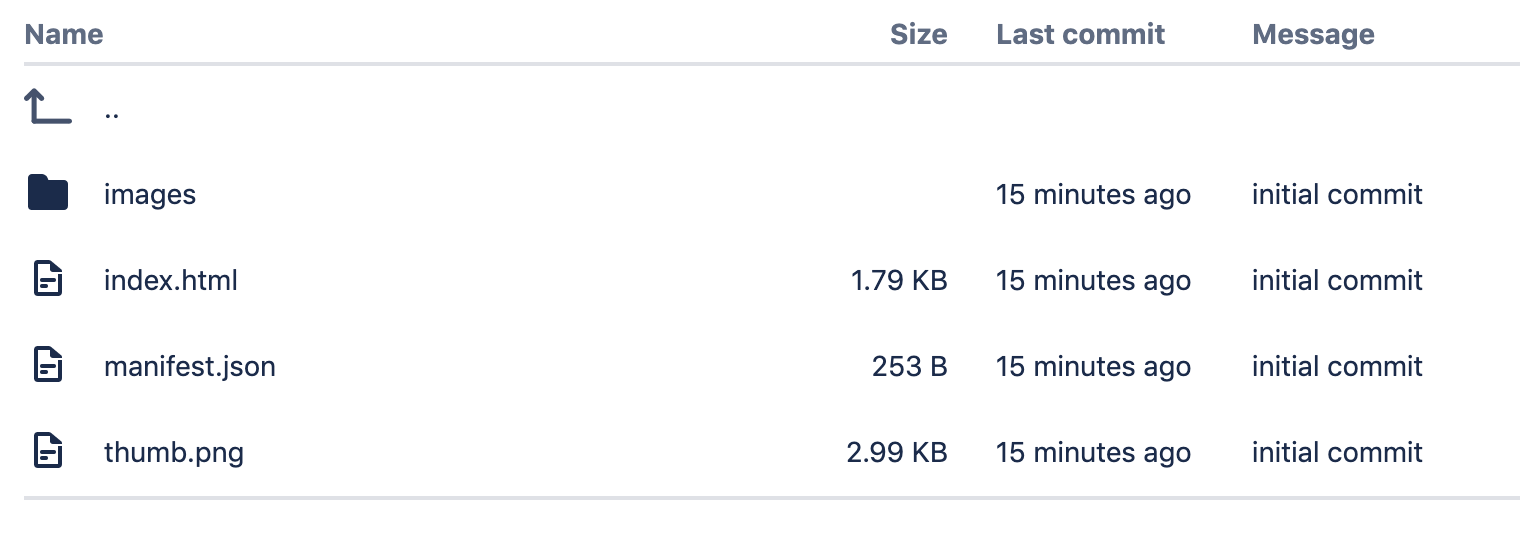
File Structure
Warning
You must provide at the very least an index.html file.
Place a html file called index.html at the root of the package, along with any other resources for your package.
Also include a thumb.png an manifest.png if you need to expoise any actions to the iDetailAid user interface.
File Structure
Requirements
- All HTML5 packages must be in ZIP format.
- The ZIP package must have a folder in the root.
- There must be a file called
index.htmlat the root. This is the first page that will be run when the package is loaded. - There must be a file called
manifest.jsonat the root. This contains any meta data to pass to the iDetailAid user interface. - There must be a file called
thumb.pngat at the root (160px x 120px) that displays a thumbnail in the iDetailAid user interface. - No online assets should be referenced (e.g. jQuery, fonts, etc.) as everything must be able to run offline.
- All assets (CSS, fonts, images) must be referenced relatively for portability.
- There is no notion of sharing resources across HTML5 packages, so all required assets must be included in each package.
- If the content needs to be scalable, it must reflow to fill its container so it can easily be resized in the iDetailAid slide editor.
- The overall dimensions of the viewable HTML area should be no more that 1024 x 768.
- The package must be able to run from a local file system and not just from a web server.
- Keep the package as lean as possible, only including the fonts, libraries and images that you actually need, and compress the images as much as possible.
thumb.png
A thumbnail to show in the iDetailAid user interface add a file called thumb.png to the root of the package.
thumb.png- 160px x 120px
manifest.json
A file describing any actions to expose to the iDetailAid user interface, see manifest.json
Localisation
It is recommended that where possible copy should be isolated from the core HTML and placed in the iDetailAid slide that contains the package. Where this is not possible, copy should be read from a configuration object that is defined in the Slide Code Editor. This will make localisation and translation easier for local affiliates.
For more information on how to pass information between the slide and n HTML package see Interaction between the slide and the HTML package
The ida global object
Each HTML package has information about the slide that it is currently in injected into its global scope under the namespace ida. This is actually a alias to full namespace of uk.co.idetailaid.
Namespaces
The main namespace injected into the HTML global scope is uk.co.idetailaid.
For convenience, the following alias is also created if available: ida.
To access the uk.co.idetailaid.Viewer API, another alias is created if available : Viewer.
If your HTML package code already defines the aliases ida or Viewer, then you must use the full namespace to access the API.
uk.co.idetailaid.Viewer.api.goBack();
else you can use the shorthand aliases:
ida.Viewer.api.goBack();
Viewer.api.goBack();
For the rest of the documentation, we use the alias ida rather than the full namespace.
Mock API
To enable you to develop outside of iDetailAid, but still call the injected API commands, you can use a mock API.
This consists of two files; a mock API, and mock presentation data.
You can edit the presentation manifest data to fit your testing needs.
The mock API can be downloaded here:
Info
The latest mock API and Manifest data can be downloaded directly from any iDetailAid presentation viewer.
Preview a slide, open the console, and run the following command:
Viewer.api.writeMockAPI()
and
Viewer.api.writeMockManifest()
This wills save two files that mocks the API.
Simply include these into your HTML package, ensuring the manifest is included first.
<script src="iDetailAid_mock_viewer_manifest.js"></script>
<script src="iDetailAid_mock_viewer_api.js"></script>
You can then edit the mock manifest to structure the data how you want for testing.
This can be left in when deployed to iDetailAid; the actual API will take precedence over the mock API.
API
The ida object contains the following properties
| property | type | description |
|---|---|---|
| ida.Viewer | Viewer |
The main iDetailAid Viewer object |
| ida.slide.element | DOMElement |
The slide DOM element |
| ida.slide.x | int |
The column the slide is in in this presentation |
| ida.slide.y | int |
The row the slide is in in this presentation |
| ida.slide.slide | Slide |
The iDetailAid slide object, containing properties like id, title etc. |
| ida.slide.scope | Object |
The public JavaScript of the slide containing this HTML package |
| ida.template.slide | Slide |
The iDetailAid template object. If the main slide is using a template. Containing properties like id, title etc. |
| ida.template.scope | Object |
The public JavaScript of the template in use by the slide containing this HTML package |
| ida.iframe.trigger | Function |
A function that will trigger an event on the iFrame Content Area in the containing slide |
Exposing Events / Actions to the iDetailAid User Interface
When creating the HTML5 package, the developer can expose certain custom events / actions to the iDetailAid user interface, allowing the content creator to choose what should happen in response to those actions.
In the example below, as well as the two default actions of tap and double tap, you can see that three extra actions have been exposed from the selected HTML package, Go Back, Show Refs overlay and Open Web Site.
Example
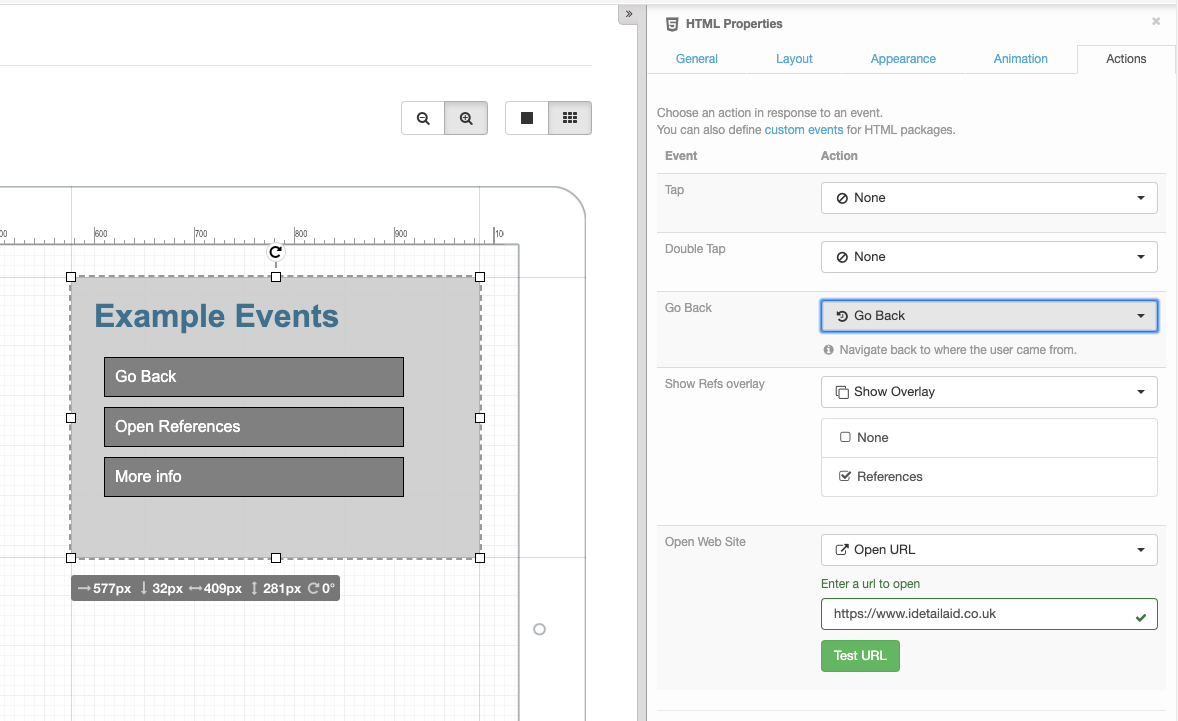
These can be any custom event triggered from the HTML5 package, it could be from a button click, when an animation ends, when some user input has been changed for example.
For an example see the Burger menu code sample.
Triggering an event from the HTML Package
in /index.html
document.getElementById("info_btn").addEventListener("click", (e) => {
    ida.iframe.trigger('openWebSite');
});
See Triggering events in the parent slide / template for more information.
The manifest.json file
The manifest json lets you define extra meta data about the HTML5 package for the iDetailAid user interface. Currently this only an events node.
Events
To expose specific events to the iDetailAid user interface, you add them to the events node in the manifest.json file. This is purely to add them to the user interface, any event triggered can be handled with code in the slide code editor.
{
   "events":[
     {"name": "Go Back",               "type":"openOverlay"},
     {"name":"Show Refs overlay",      "type":"openSlide"},
     {"name":"Navigate Left",          "type":"navigateLeft"}
   ]
}
Each entry is an object with the following properties.
| property | description |
|---|---|
name |
The display name that appears in the iDetailAid user interface |
type |
the unique event name that has been triggered somewhere in the HTML package with ida.iframe.trigger |
Interaction between the slide and the HTML package
The slide code editor can set values and call methods in the HTML package, and the HTML package has visibility of "public" properties and functions in the slide scope.
The slide editor can also listen out for custom events triggered by the HTML package.
Events
Triggering events in the parent slide / template
You can listen for custom events in the slide code editor, or the template code editor, and trigger them from the HTML package.
The Viewer injects a global ida object into the HTML package that exposes a special method that will trigger events on the <iFrame/> that holds this HTML package.
ida.iframe.trigger
ida.iframe.trigger ( eventName, detail )
Trigger a custom event on the <iFrame/> in the parent slide.
| Argument | Type | Description |
|---|---|---|
| eventName | string |
The name of the event to trigger |
| detail | object |
An object containing extra event data that is exposed via event.detail |
Example
First give your HTML Content Area a name and then follow these examples.
Slide Code Editor
$slide.find('#myHTMLContentAreaName').on('myCustomEvent', (event) => {
    const value = event.detail.value;
    // now insert the value from the HTML package
    // into a content area in the slide
    const area = $slide.find('#myDisplayContentAreaName');
    area.html( "The value is " + value );

    // To preserve formatting, or replace just part of the text,
    // enter a token in your text area that you can replace, for example:
    // The value is {{value}}%
    // Then replace the {{value}} token like this...
    area.html( area.html().replace("{{value}}", value) );
})
HTML Package
// ida.iframe.trigger is the bridge to trigger an event on the
// iFrame in the main slide holding this HTML

// This example listens to the `change` event on a jQuery UI slider
// and then triggers a custom `myCustomEvent` in the parent slide
// passing an  object as the event.detail
$('#slider').on('change', (event, ui) => {
    ida.iframe.trigger('myCustomEvent', {value:ui.value});
});
Listening for events from the parent slide
You can listen out for the various iDetailAid Viewer Events from within your HTML package.
As HTML packages are loaded into an <iFrame/> inside the Viewer, all Viewer events are proxied into the iFrame and triggered on the iFrame's document object.
To listen for a slideLoaded event from within an HTML package, you would do the following.
window.addEventListener('load', () => {
  document.addEventListener('slideLoaded', event => {
    let msg = "HTML package has received %s event from slide %s";
    console.log( msg, event.type, event.detail.slide.title);
  });
});
$(() => {
  $(document).on('slideLoaded', event => {
    let msg = "HTML package has received slideLoaded event from slide %s";
    console.log( msg, event.detail.slide.title);
    })
});
Note
The HTML package will only receive events from the its parent slide. It will not receive events from other cached slides in the Viewer.
Tip
Wait for the window load event before registering for iDetailAid Viewer events
Warning
jQuery is not available by default in HTML packages, you must include it yourself if you wish to use it.
Functions / Data
Slide to iFrame communication
You can call functions in the <iFrame/> from the slide Code Editor, and pass things like localisation and configuration that has been defined in the slide. This makes the HTML package more portable between regions and products.
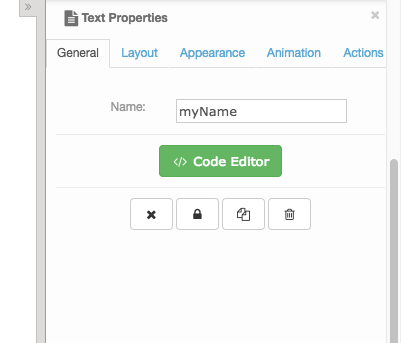
First give your HTML content area a name:
- Click the content area
- In the properties side bar, select the "General" tab
- Enter a name in the text field
Example
Then target the HTML from the slide code editor
Slide Code Editor
var htmlPackageSettings = {
    welcome:'Welcome to the animation',
    startAt:10
}

$slide.on('slideLoaded', (event)=> {
    $slide.find('#myName iframe').get(0).contentWindow.applySettings( htmlPackageSettings );
});
And define the function applySettings( settings ) in your HTML package
HTML Package
function applySettings( settings ) {
    // Update some ui in the HTML package
    $('#welcome').html( settings.welcome || 'Welcome' );

    if (settings && settings.startAt) {
        graph.startAt ( settings.startAt );
    }
}
iFrame to slide communication
The <iFrame/> can also easily read data defined in the slide, or the slide template.
The slide exposes its JavaScript scope to the HTML package via ida.slide.scope. Similarly, the template exposes its scope via ida.template.scope.
See Scope for more.
To read data from the slide code editor you would:
Slide Code Editor
// htmlPackageSettings declared with `this` not `var` makes it "public"
// and thus available to the HTML package
this.htmlPackageSettings = {
    welcome:'Welcome to the animation',
    startAt:10
}
HTML Package
// ida.slide.scope exposes anything declared with `this` in the slide
var settings = ida.slide.scope.htmlPackageSettings;

$('#welcome').html( settings.welcome || 'Welcome' );

if (settings && settings.startAt) {
    graph.startAt ( settings.startAt );
}
Warning
Don't use the global window scope of the presentation viewer to pass data between the slide as cached slides could overwrite the data.
var settings = parent.window.htmlPackageSettings;
Calling the Viewer API
You can also call the Viewer API methods from within your HTML package.
Accessing the API from an iFrame
You can access the Viewer.api from an an HTML package via the injected ida object.
ida.Viewer.api.goLeft();
window.getElementByTagName('backButton').addEventListener('click', event => {
    ida.Viewer.api.goBack();
});
$('#backButton').on('click', event => ida.Viewer.api.goBack() );
Interactive HTML elements / preventing swiping
By default, swiping over an HTML element will invoke a swipe navigation action. If you would rather the user interact with the HTML area you need to flag all, or part of the HTML as interactive.
You do this by adding the class .interactive to the area you want the user to interact with.
This element (and all its children) will no longer trigger a swipe navigation action, and will permit interaction as defined in the HTML5 package.
Incorrect
Swipe anywhere on this HTML package will trigger a swipe navigation, so the user cannot drag the UI sliders
<div>
    <div class="bar-chart"></div>
    <div class="sliders"></div>
    <div class="key"></div>
</div>
Correct
The whole area now responds to user input so they can now drag the UI sliders.
<div class="interactive">
    <div class="bar-chart"></div>
    <div class="sliders"></div>
    <div class="key"></div>
</div>
Tip
You can make specific areas of the HTML interactive, by adding the class to just those elements.
<div>
    <div class="bar-chart"></div>
    <div class="interactive sliders"></div>
    <div class="key"></div>
</div>
Veeva JavaScript Library
From within the HTML package, you have access to the Veeva JavaScript library to allow you to develop content which interacts with the Veeva CRM database.
To access it from your HTML package simply append top to the veeva namespace, for example:
top.com.veeva.clm.getDataForCurrentObject(
    "Presentation",
    "Survey_vod__c",
    response => {

    });
Putting it all together
have a look over the code samples for further examples
Example