Slides
Introduction to Slides
Slides form the bulk of the content flow and messaging. Before a presentation can be created, slides must be created in the Slide Editor.
Creating a Slide
To create a new slide, select the 'Slides' tab from the top navigation bar and select 'Create new slide'.
Creating a New Slide
Editing an Existing Slide
To edit an existing slide, select the 'Slides' tab from the top navigation bar, hover over an existing slide and click the 'edit icon'.
Naming a Slide
In the 'Slide Properties' section, type your slide title into the box provided. We would recommend something descriptive allowing for easy identification/filtering during the presentation creation process.
Tip
A slide title must be entered before a slide can be saved
Naming a Slide
Previewing a Slide
In the slide editor, above the iPad outline, a user has the ability to preview a slide using the 'Preview Slide' button. This generates a popup window within which the slide is displayed. This view provides an accurate representation of how the slide will render when on an iPad device.
To close the preview window, click the 'close' button in the right corner of the window.
Tip
If the preview window does not display, ensure that popups are not blocked in the browser
Saving a Slide
iDetailAid auto saves slides every 10 seconds. It is also possible to manually save the slide by pressing the 'Save' button.
Tip
A slide title must be entered before a slide can be saved nor auto-saved
Customising Slides
Changing the Slide Background Colour
In order to change the background colour of a slide, follow these steps:
- Click the colour picker in the 'Appearance tab' in the Slide Properties section of the side bar.
- Pick a colour from those available.
Changing the Slide Background Image
In order to change the background image of a slide, follow these steps:
- Click the 'Appearance tab' in the Slide Properties section of the side bar.
- Choose 'Select Image'.
- Select an image from or upload an image to the Asset browser.
Tip
We recommend that this image is optimised for iPad retina display (2048px x 1536px).
Using Preset Style Slides for Background
In order to change the slide background using preset styles, follow these steps:
- Ensure that preset styles are set and added in through the development process.
- Click the 'Appearance tab' in the Slide Properties section of the side bar.
- Choose 'Preset Style'.
- Select from the list that appears on screen.
Clear the Slide Background
- Click the 'Appearance tab' in the Slide Properties section of the side bar.
- Choose the 'Remove Image' button or 'No Colour' button
Customising the Slide Background
Content Areas
Adding Content/Assets
Above the outline of the iPad, which is used as a canvas where content can be arranged, you are presented with the tools to begin laying out and adding content to your slide.
Adding Content to Slide
To add a blank content area to a slide, click the 'Add Content Area' button. Alternatively, to add content of a specific type, click the arrow on the 'Add Content Area' button and select the appropriate content type.

It is also possible to add content into a slide by right clicking in the iPad canvas

Duplicating Content Areas
In order to duplicate a content area:
- Select the content area to be duplicated
- Right-click the content area and choose 'Duplicate'
Duplicating a Content Area
An exact duplicate of the content area is created including any associated Text, Images, Video, Navigation or HTML5.
Please Note
It is not possible to duplicate content between slides. However, content can be copied from the main slide to an overlay.
Tip
You can also use keyboard shortcuts to duplicate a content area - use Ctrl+C to copy the area, then Ctrl+V to paste in a copy.
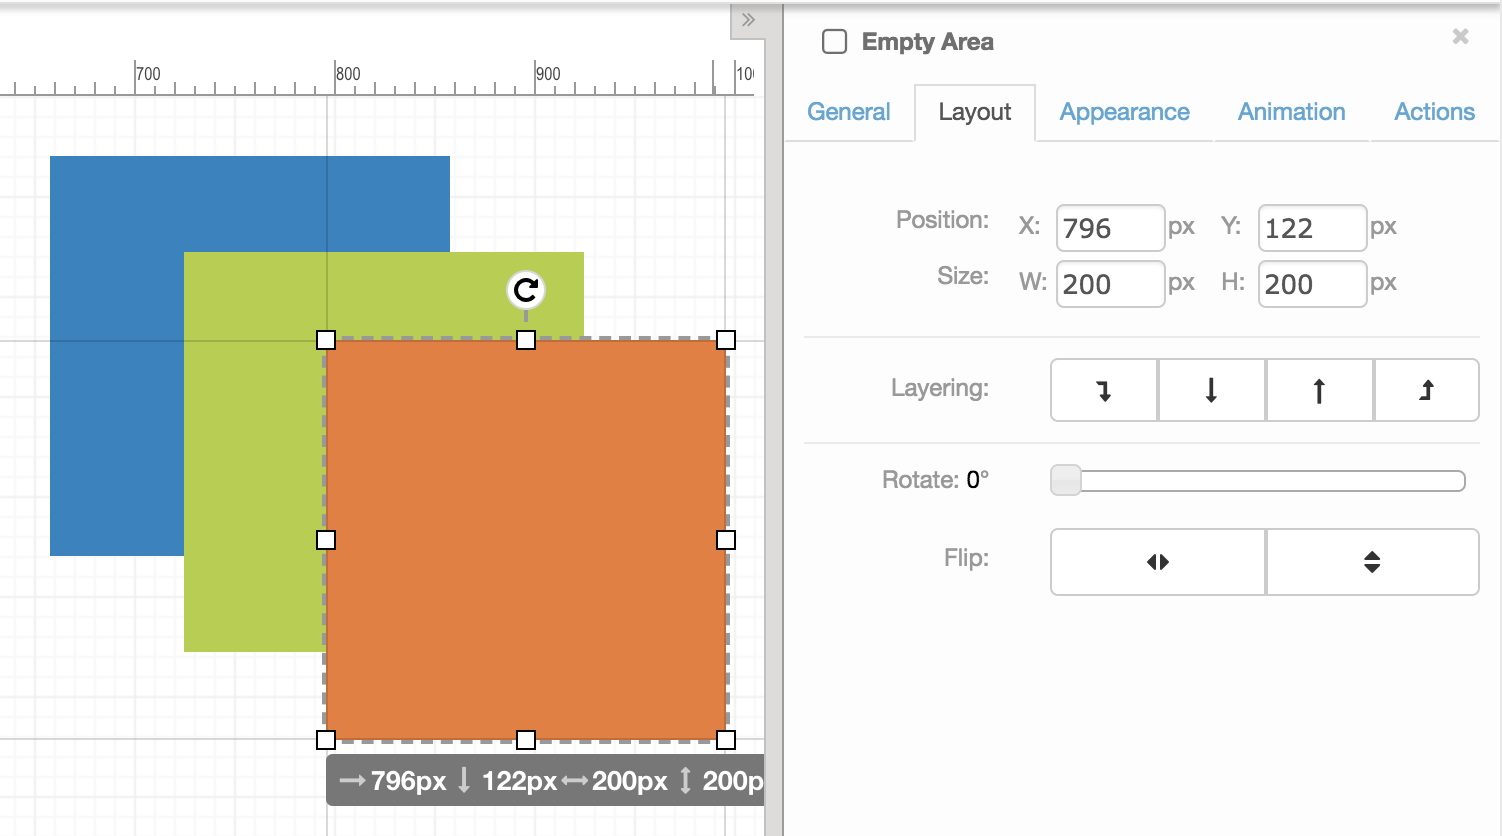
Layering Content Areas
Layers in the slide editor let you stack multiple content areas on top of each other and move them forward or back, providing total flexibility when creating and laying out content.
An exact duplicate of the content area is created including any associated Text, Images, Video, Navigation or HTML5.
Styling and Animating Content Areas
Content areas can now have certain styles applied to them whether they contain content or not. This means you can add background colours or images as well as animations before any content is applied. These styles will also be preserved if a content area is cleared.
- Content Area Border Radius
It is now possible to edit the border radius of each corner of a content area in pixels as well as percentages.
Content Area Border
- Slide Editor Enhancements
Additional enhancements have been made to the slide editor, providing a rollover and selected state to content areas. This provides more accurate editing and position of content areas in a slide.

- Animating Content Areas
There is an extended list of CSS animations that can be applied to content areas with more control over timings. Speed and delay options are also available.
Animating Content Areas
- Scrollable Text-Based Content Areas
There is an option for text-based content areas to be scrollable.
Scrollable Text
Overlays
iDetailAid allows the creation of overlays or popups, which can be used to introduce interactivity and house supplemental information about a topic.
Creating an Overlay
Selecting 'Add Overlay' generates another instance of the iPad canvas and displays the chosen overlay. Content can be added in exactly the same manner as on the main slide.
Once an overlay is created, a content area must be assigned an 'Open Overlay' action
To create an overlay:
- Click the 'Add Overlay' button
- Or, if more than one overlay style is available, click the arrow on the 'Add Overlay' button and select the appropriate overlay style.
Adding an Overlay to Slide
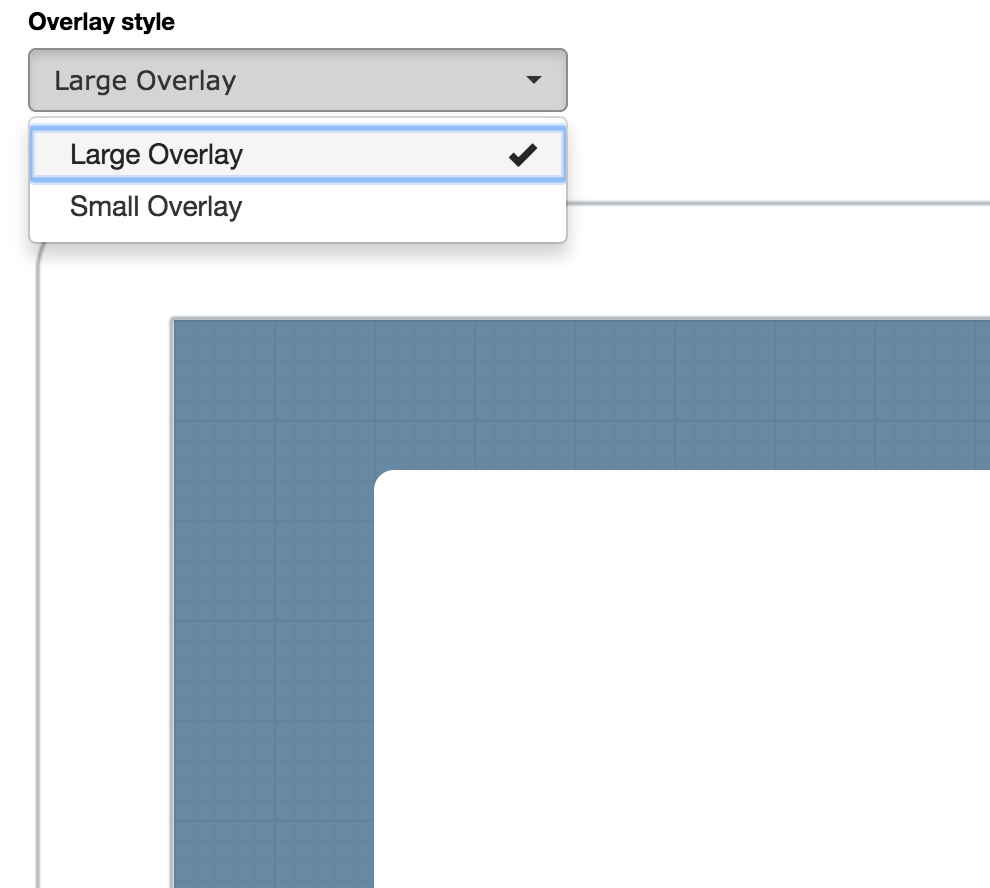
The style of an overlay can be changed by using the Overlay Style dropdown:
Launching Overlays
Once an overlay has been created, a 'Show Overlay' action must be assigned to a content area on the main slide (or in another overlay):
- Select the content area that should be used to launch the overlay
- In the properties side bar, click the 'Actions' tab
- Select 'Show Overlay' from the drop down
- Check the box next to the overlay that should be opened
Adding Actions to Overlays on Slide
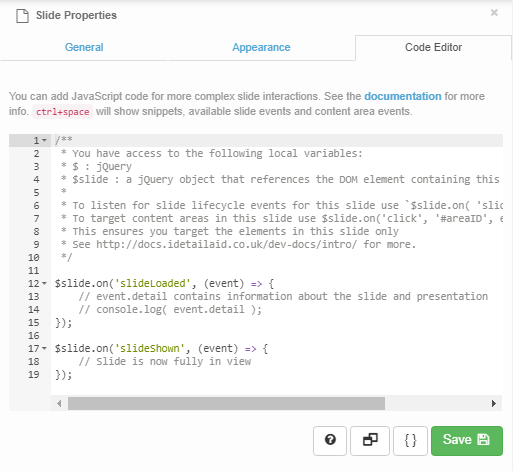
Inline Code Editor
In the iDetailAid Slide Editor there is an inline, slide level code editor. This allows content authors to write JavaScript code which can respond to iDetailAid Viewer Events and Content Area Events.
Click Here for further information on the Inline Code Editor.